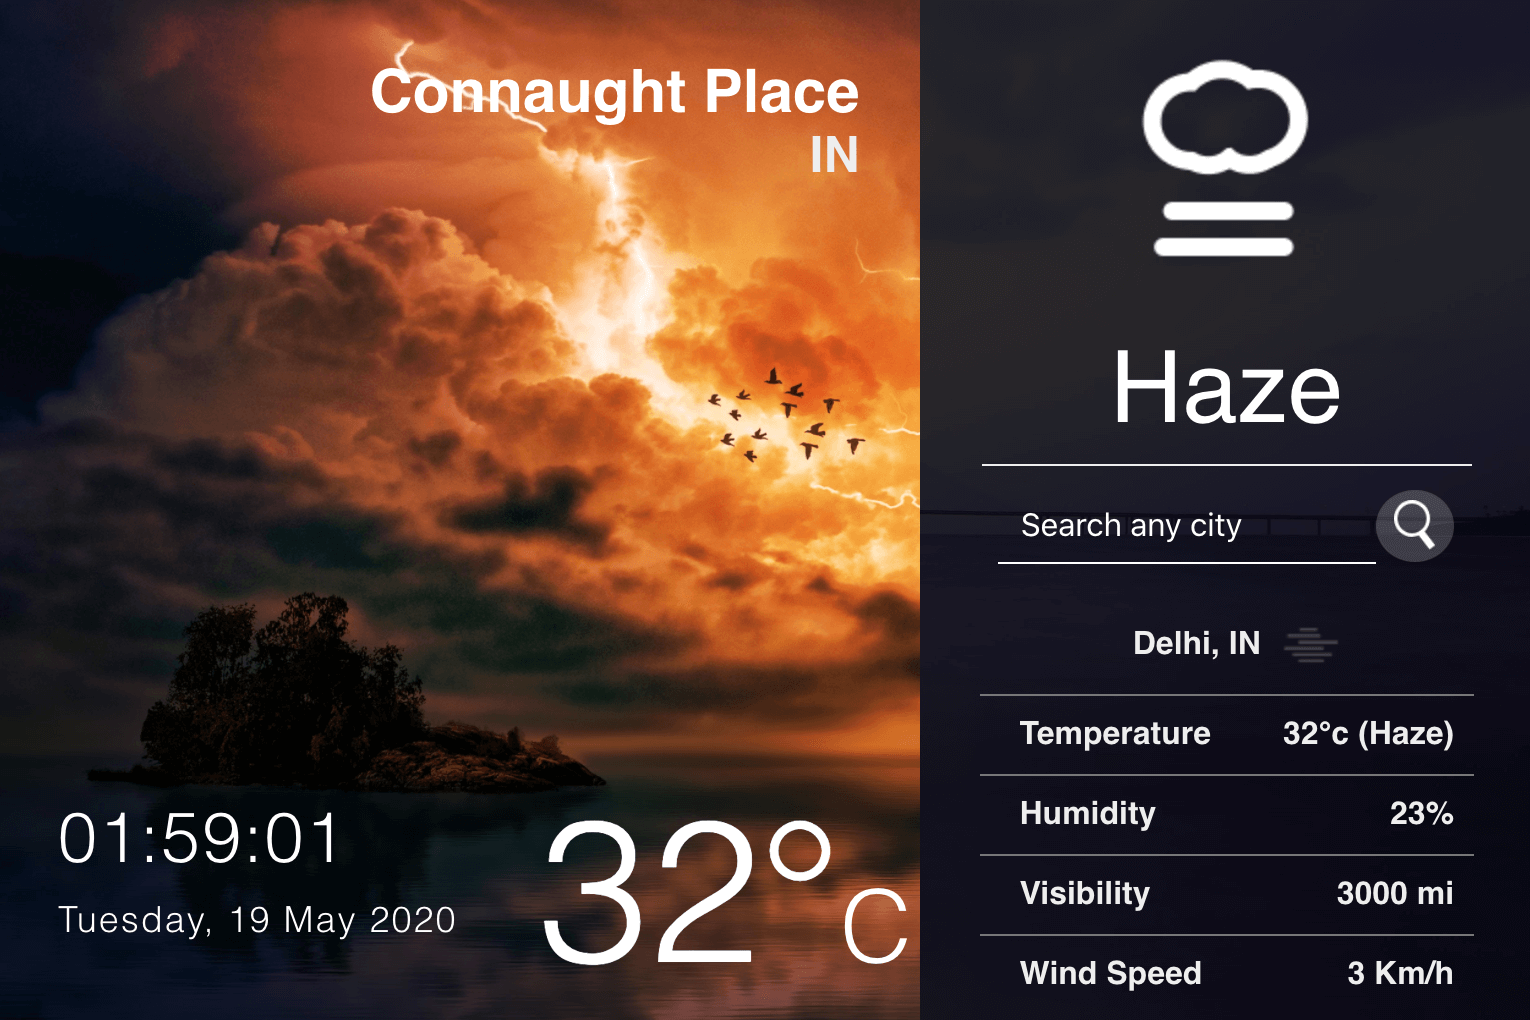
In this Article, I’ll demonstrate how to build weather
application that performs two task. First, this app will
show
Real time weather of your
Current location & Second, it will shows
the Weather conditions of a particular city
when you search the particular city.
While making this app you will learn all the basics in
React.js such as Hooks, States, Props, Components, effects,
API Call, Dynamic data display, Dynamic fetch data, Working
with forms, & many more. Let's start coding!
SOURCE CODE DOWNLOAD

For Demo & Source Code Scroll down.
#Setting up React
mkdir weather
    cd weather
    npx create-react-app weather
The installation process will start immediately and once
completed, your react setup is successfully completed and it
will redirect on your browser in localhost:3000.
#Install packages
These packages are:
1. react-animated-weather
2. react-live-clock
3. axios
To install these packages simply add
npm i before name of any package & it will get
included into your react app.
#Get your API Keys
To get weather data we need to use API to fetch data & for
that i have used
Open Weather Map API. Its free to use & highly accurate data.
To get your keys, simply sign up into
Open Weather &
then confirm your email account & after this you will get
Your API key. Your API Key will be sent to
to mail & also you can find your key into dashboard in the
same website.
Now, finally you got your API Key then include that key into
your app by creating new file apiKeys.js &
add your key with API domain.
    module.exports = {
      key: "{Your API Key Here}",
      base: "https://api.openweathermap.org/data/2.5/",
    };
#App phase-1 (Current
location weather data)
First, let's see how we can detect user's current location
using navigator.geolocation. This allows a Web
site or app to return customized results based on the user's
location. Make a new file know as
currentLocation.js.
    if (navigator.geolocation) {
        this.getPosition()
        .then((position) => {
          this.getWeather(position.coords.latitude, position.coords.longitude);
        });
    } else {
      alert("Geolocation not available");
    }
In above code, i'm fetching user's current location on the
basis on latitude & longitude after this passing values into
getWeather() where we'll fetch data by passing
latitude value & longitude value through API. Also note that
i've checked position because this is a by
default return value & latitude & longitude are also by
default. To learn more about default values you can get by
using navigator.geolocation visit
Here.
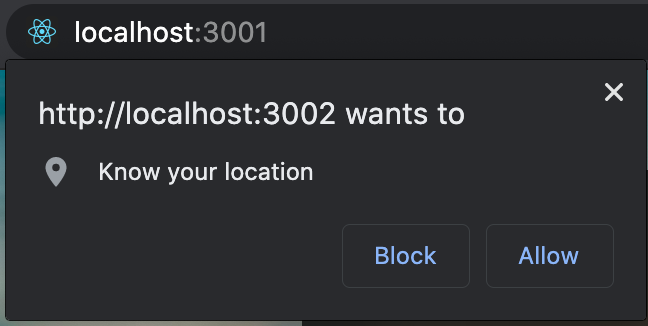
If you run above code, location prompt will be open which
ask from user to allow or block location access to your app.

Now, Question will arise that if user allow location service
then all good app will work fine but if user denied then
what will happen ?. We also solved this issue.
    if (navigator.geolocation) {
        this.getPosition()
        .then((position) => {
          this.getWeather(position.coords.latitude, position.coords.longitude);
        })
        .catch((err) => {
          this.getWeather(28.67, 77.22);
          alert(
            "You have disabled location service."
          );
        });
    } else {
      alert("Geolocation not available");
    }
Now, if you notice we have added
.catch((err) into existing code & this will
detect if user denied location service then
Catch block will be executed. In this block
i've simply displayed alert box with message
"You have disabled location service.", So
user can enable the location by going into settings.
Also we need our app to run even is user disabled location
service for that I've simply passed random latitude &
longitude values into getWeather() & values
such as getWeather(28.67, 77.22). This will let
our app run with random coordinates & after user enable
location service app will show data according to that.
#Phase-1 (Get weather
Data)
Now, We have user's current location coordinates & API Key.
We just need to pass location coordinates value with API.
Also we make sure that API can be accessed
Dynamic so every time any user form any
location open your app data should be show according to
user's location.
`${apiKeys.base}weather?lat=${lat}&lon=${lon}&units=metric&APPID=${apiKeys.key}`
This is How Dynamic API in React can be
build. As we already created apiKeys.js file
where our Key is stored. We need to include that file into
this one to access key.
import apiKeys from "./apiKeys";
Now after include apiKey file, We can access by using
apiKeys.key & apiKeys.base. Get back to URL
${lat} & ${lon} are the parameters
which will contain latitude & longitude value which we got
through using navigator.geolocation.
    getWeather = async (lat, lon) => {
      const api_call = await fetch(
        `${apiKeys.base}weather?lat=${lat}&lon=${lon}&units=metric&APPID=${apiKeys.key}`
      );
      const data = await api_call.json();
      this.setState({
        lat: lat,
        lon: lon,
        city: data.name,
        temperatureC: Math.round(data.main.temp),
        temperatureF: Math.round(data.main.temp * 1.8 + 32),
        humidity: data.main.humidity,
        main: data.weather[0].main,
        country: data.sys.country,
      });
    };
In above code, we used Async/Await to fetch data from API.
After passing coordinates value. We will
setState all the data, which we got through
using API & display that data.
#App phase-2 (Weather
conditions of a particular city)
Concept behind getting data for Current location is same for
Weather conditions of a particular city only difference is
we are using React Hooks to use states in
this.
    const [query, setQuery] = useState("");
    const [error, setError] = useState("");
    const [weather, setWeather] = useState({});
Now, let's see how we can get data through form & then pass
that to API & get weather data.
    <input
    type="text"
    className="search-bar"
    placeholder="Search any city"
    onChange={(e) => setQuery(e.target.value)}
    value={query}
  />
  <div className="img-box">
    {" "}
    <img
      src="https://images.avishkaar.cc/workflow/newhp/search-white.png"
      onClick={search}
    />
In above code, when user enter any city name into search
filed then we will store that data into
setQuery by using onChange &
e.target.value. e.target.value is
used to get value which user is entering into search field.
After this we want user to click on
Search icon where
search function will call & there we will fetch
weather data for query which user passed.
    const search = (city) => {
      axios
        .get(
          `${apiKeys.base}weather?q=${
            city != "[object Object]" ? city : query
          }&units=metric&APPID=${apiKeys.key}`
        )
        .then((response) => {
          setWeather(response.data);
          setQuery("");
        })
        .catch(function (error) {
          console.log(error);
          setWeather("");
          setQuery("");
          setError({ message: "Not Found", query: query });
        });
    };
Concept of Dynamic binding API is same as previous just two
changes. First one iscity != "[object Object]" ? city : query, this is because when user is opening app for first time
then:
    useEffect(() => {
      search("Delhi");
    }, []);
Above code will call where i've pass name of random city to
fill the blank space & after user search for any other city
then random city data which i've defined when user open app
for first time data of that will be swapped with searched
query. To make sure that
Random city data run for once i;ve used
above code with [].
Now to ensure that user didn't search for any city yet &
user is opening app for first time. I've simply checked in
city Parameter that if its contain
"[object Object]" which means that there is
instance of an object & if that so then
query will true otherwise
city parameter will true.
    axios
    .get(
      `${apiKeys.base}weather?q=${
        city != "[object Object]" ? city : query
      }&units=metric&APPID=${apiKeys.key}`
    )
Now second change, In API we will passed city name parameter
rather than latitude & longitude parameter as shown in above
code. In previous we fetched data using Async/Await but in
this we'll fetch data using axios
    const search = (city) => {
      alert(city);
      axios
        .get(
          `${apiKeys.base}weather?q=${
            city != "[object Object]" ? city : query
          }&units=metric&APPID=${apiKeys.key}`
        )
        .then((response) => {
          setWeather(response.data);
          setQuery("");
        })
        .catch(function (error) {
          console.log(error);
          setWeather("");
          setQuery("");
          setError({ message: "Not Found", query: query });
        });
    };
Here is the full code view when data will be fetched then it
will set to setWeather(response.data) & will
make setQuery("") empty to get another query
from user.
Also if user searched for wrong city name then have
setError({ message: "Not Found", query: query });, Which will be show error message with the query that user
searched.
#Animated weather
Showing weather icon according to climate condition of
searched city or current location of user is done by using
NPM Package know as react-animated-weather
First, I've state icon: "CLEAR_DAY" & then
define some other default values such as:
    const defaults = {
      color: "white",
      size: 112,
      animate: true,
    };
Above code will define Color, size & animation of weather
icon. Now to get icon Dynamic according to the weather
condition. We do switch case for climate condition data
which we got through API. this.state.main is
containing climate condition & now fill perform switch case
on that value.
    switch (this.state.main) {
      case "Haze":
        this.setState({ icon: "CLEAR_DAY" });
        break;
      case "Clouds":
        this.setState({ icon: "CLOUDY" });
        break;
      case "Rain":
        this.setState({ icon: "RAIN" });
        break;
      case "Snow":
        this.setState({ icon: "SNOW" });
        break;
      case "Dust":
        this.setState({ icon: "WIND" });
        break;
      case "Drizzle":
        this.setState({ icon: "SLEET" });
        break;
      case "Fog":
        this.setState({ icon: "FOG" });
        break;
      case "Smoke":
        this.setState({ icon: "FOG" });
        break;
      case "Tornado":
        this.setState({ icon: "WIND" });
        break;
      default:
        this.setState({ icon: "CLEAR_DAY" });
    }
In above code, CASE containing the defined values by
openweathermap & then i've
this.setState({ icon: "Icon_Name" }); & in
Icon_Name here you need to define
appropriate animated icon name. react-animated-weather icon
names are defined
here.
You will get all files,
when you
download the source code.
And after than you can edit it according to you
if you face any issues you can
contact by
asking question with article link.
You can go through Demo as
well as Download source
code for the same & make changes according to you


